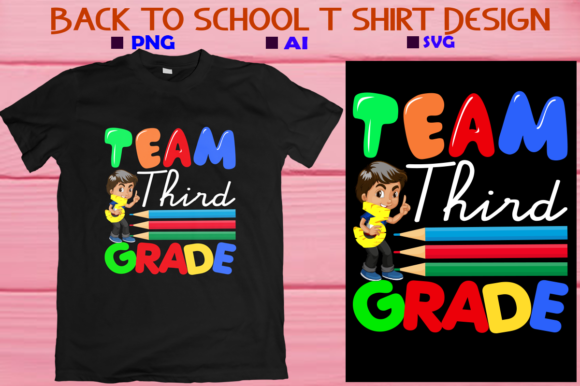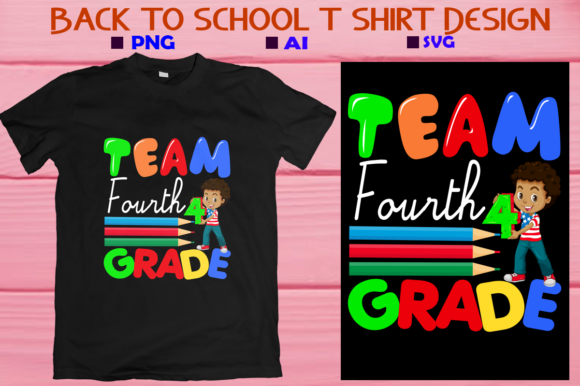
Getting Your Team Third Grade Back to School Design Right
Every August, the hunt for the perfect back-to-school look begins, and teachers everywhere start thinking about how to mark the start of a new year. If you have landed on the Team Third Grade Back to School concept, you are likely excited to create something memorable for yourself, your colleagues, or your students’ families. The design files you receive—EPS for Adobe Illustrator CS6, SVG for web use, a JPG file, and a mockup PNG file at 4500×5400 pixels with 300 dpi—give you an excellent starting point. But having great files is only half the story. How you use, adapt, and apply that design determines whether you end up with something polished or something that falls flat. Let’s walk through the details that separate a professional result from a missed opportunity.
What Makes Team Third Grade Back to School Worth Your Time
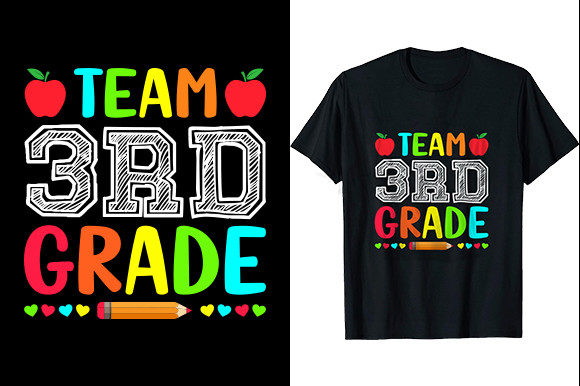
The phrase Team Third Grade taps into something real: a sense of community and shared purpose. Third grade is a pivotal year where students move from learning to read to reading to learn, and teachers in this grade form tight bonds with their students and each other. The design itself usually carries playful, bold lettering and graphics that say, “We are in this together.” Whether you plan to wear it on a t-shirt, print it on a mug, or use it for a classroom poster, the design signals belonging. That emotional connection is why so many educators, school staff, and even parents gravitate toward it.
But here is where things get tricky. Many people assume that because they have a high-resolution file, any application will look great. That assumption leads to disappointment. The design is versatile, but each medium demands a different approach. Ignoring those differences is the first common mistake.
Mistake One: Treating All File Formats the Same
You receive four formats: EPS, SVG, JPG, and PNG. Each one serves a specific purpose, and using the wrong one for a job causes unnecessary problems. The EPS file is your vector master. It is meant for Adobe Illustrator CS6 and keeps every line crisp at any size. Use this when you need to resize the design dramatically, like blowing it up for a large poster or shrinking it for a small bag tag. The SVG file works similarly but is better suited for web use, such as adding the design to a classroom website or a digital newsletter.
The JPG and PNG files are raster images. They are fixed at 4500×5400 pixels at 300 dpi, which is plenty large for most print applications. But here is the oversight: a JPG compresses image data and loses some subtle detail, especially around text edges. A PNG preserves transparency and sharper edges. If you want to print on a dark t-shirt, you need the PNG with a transparent background so the shirt color shows through. If you use the JPG on a dark shirt, you will get a white box around your design. That small detail ruins an otherwise good project.
Better approach: Keep the EPS as your master file. Only export to PNG with transparency when you need that format for printing on dark or colored surfaces. Use the SVG for any digital use. Reserve the JPG for light-colored backgrounds where a white rectangle won’t be noticeable.
Mistake Two: Forgetting the Mockup PNG Is a Preview Tool
The mockup PNG file you receive is a huge help for visualizing your design on a product. At 4500×5400 pixels and 300 dpi, it looks realistic and high-end. But some people try to use the mockup itself for production. They send the mockup file to a printer thinking it will work. It won’t. A mockup typically includes shadows, highlights, and background elements that are not part of the actual printable design. Printing a mockup results in distorted colors, misplaced shadows, and a result that looks nothing like what you imagined.
Better approach: Use the mockup to present your idea to a client, your team, or your principal. Show them the mockup so everyone agrees on the look. Then send the actual EPS or PNG file to your printer or upload it to a print-on-demand service. Never send a mockup for production.
Mistake Three: Assuming One Size Fits All Products
The “Team Third Grade Back to School” design can go on t-shirts, mugs, bags, poster cards, and more. That is the beauty of vector art. But the mistake is thinking you can use the exact same file at the exact same size for every product. A design that looks balanced on a t-shirt front will likely be too large for a mug and too small for a tote bag. Product dimensions vary, and what works on one surface feels cramped or lost on another.
For example, a standard t-shirt print area is roughly 12 by 14 inches. Your design at full file size would be about 15 by 18 inches at 300 dpi, so it fits well with minor scaling. But a mug typically has a print area of about 8 by 3 inches. If you shrink the design uniformly to fit that space, the text becomes tiny and unreadable. You need to adjust the layout, perhaps stack the words differently or remove decorative elements that don’t scale down.
Better approach: Before you commit to a product, measure the printable area. Then open your vector file in Illustrator or Inkscape and create a version tailored to that space. Keep the core message and adjust the arrangement. This takes a few extra minutes and saves you from producing something that looks like an afterthought.
Mistake Four: Ignoring Color Separation for T-Shirt Printing
T-shirt printing methods vary. Screen printing, direct-to-garment (DTG), and heat transfer vinyl each handle color differently. The design you have likely includes multiple colors. Screen printing requires a separate screen for each color, which increases cost. If you send a full-color file to a screen printer without discussing separations, you might get a quote that surprises you or a print that doesn’t match your file because the printer had to guess how to separate colors.
DTG printing handles full-color designs well, but it works best on 100% cotton shirts. Heat transfer vinyl requires you to cut each color layer separately, which is tedious for a multi-color design. Many people skip this research and end up paying too much or getting a product that fades after a few washes.
Better approach: Decide your printing method first. If you go with screen printing, simplify your design to two or three colors. Your vector file makes this easy because you can isolate each color group. If you use DTG, keep the design as is but verify your shirt material. If you use heat transfer vinyl, consider converting the design to a single-color silhouette or a simplified two-color version. Planning your print method upfront saves money and frustration.
Mistake Five: Overlooking Licensing and Usage Rights
When you download a design like this, it often comes with a license that specifies how you can use it. Some licenses allow personal use only, meaning you can make a shirt for yourself or gifts for friends but not sell them. Other licenses permit commercial use, which lets you sell products on Etsy, at craft fairs, or to your school’s PTA. Misunderstanding this leads to legal trouble or having your shop listing taken down.
I have seen educators buy a design thinking they can sell shirts as a fundraiser, only to find out the license strictly forbids that. They either have to negotiate a separate license or stop selling altogether. That is an awkward conversation with the principal or the fundraising committee.
Better approach: Read the license file that comes with your purchase. If no license is included, contact the seller. Look for keywords like “personal use,” “commercial use,” and “print on demand.” If you plan to sell products, buy a design that explicitly grants commercial rights. Spending a few extra dollars upfront protects you from headaches later.
Mistake Six: Neglecting Proofing Before Production
You have the file, you picked a product, and you sent it to the printer. But did you check the proof? Printing errors happen: colors shift, text gets cut off, alignment drifts. Many people skip the proofing step because they trust the file or they are in a hurry for the first day of school. That rush leads to a batch of misprinted shirts or mugs that you cannot use.
Better approach: Always request a digital proof from your printer before they run the full order. Look at the proof on a calibrated screen if possible. Check that all text is legible, colors match your intent, and the design fits within the print area. If something looks off, ask for a revision. One proof is faster and cheaper than reprinting an entire order.
Practical Next Steps for Your Team Third Grade Project
You now have a clear picture of what can go wrong and how to avoid it. Here is a simple checklist before you move forward:
- Open your EPS file in Adobe Illustrator to confirm all layers and colors are as expected.
- Export a PNG with transparency from the vector file for any dark-surface printing.
- Use the mockup PNG only for presentations, not for production.
- Measure your target product’s print area and adjust your design layout accordingly.
- Choose your printing method based on your budget, volume, and shirt material.
- Verify your license covers exactly what you plan to do.
- Request and review a proof before the final print run.
When you respect the differences between file formats, product surfaces, and printing methods, your Team Third Grade Back to School design will look professional and last. The effort you put into preparation shows in the final product. Whether you are making one shirt for yourself or fifty for your team, getting the details right means you can wear your design with pride.
Your third-grade community deserves something that represents them well. Take the extra steps, avoid the common pitfalls, and you will deliver exactly that.