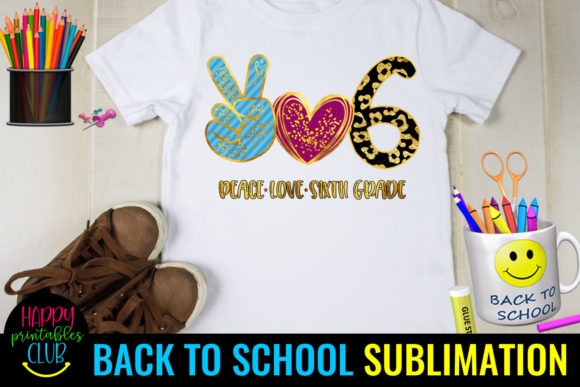
Peace Love Fifth Grade – Back to School: What to Know Before You Download and Cut
Getting ready for a new school year is always a mix of excitement and logistics. If you have a fifth grader, you know this milestone grade comes with its own energy—they are not little kids anymore, but they are not quite middle schoolers either. That is why a design like Peace Love Fifth Grade – Back to School resonates so well. It captures the nostalgia, the pride, and the fresh start all in one graphic. But before you hit download, there are a few things worth understanding so you get the most out of your purchase and avoid the common frustrations that catch even experienced crafters off guard.
This article walks through the practical side of using digital cutting files—from what arrives in your zip folder to how to avoid mistakes that waste time, materials, and money. Whether you are a hobbyist making a shirt for your own child or a small business owner fulfilling orders, knowing these details will save you headaches and help you produce clean, professional results every time.
What Exactly Is Included in Your Download
When you purchase Peace Love Fifth Grade – Back to School, you are buying a set of digital files, not a physical product. That means no shirt, no mug, no sticker arrives at your door. Instead, you get a zip compressed folder containing five file types: one SVG, one AI, one EPS, one PNG, and one DXF. Each serves a slightly different purpose, and understanding the differences is where many people make their first mistake.
The SVG file is the workhorse for most cutting machines. It keeps the design crisp and allows the software to read the cut lines correctly. The AI and EPS files are vector formats best suited for Adobe Illustrator or other professional design software. The PNG is a high-resolution raster image ideal for previews, mockups, or printing on items where you do not need cut lines. The DXF file is another vector option that some older machines or specific software prefer. Having all five means you are covered no matter what system you use, but only if you know which one to open and how to handle it.
A common misunderstanding is that opening the PNG file in a cutting program will work the same as the SVG. It will not. The PNG has no cut paths—it is a flat image. If you try to cut it directly, your machine will either refuse or produce a messy outline. Always use the SVG or DXF for cutting, and keep the PNG for displaying the design or printing on paper-based projects.
The Zip Folder: Simple but Often Mishandled
Your files arrive inside a zip compressed folder. This is standard for digital downloads, but it trips up beginners and sometimes even seasoned users. The mistake is trying to open the files directly from within the zip without extracting them first. Many cutting software programs cannot read files while they are still compressed. You need to right-click the folder, choose "Extract All," and save the files to a folder on your computer. Once they are extracted, you can import them into Cricut Design Space, Silhouette Studio, or your preferred program.
Another oversight is renaming the files inside the zip before extraction. Keep the original filenames intact until you have them safely on your hard drive. Renaming mid-extraction can sometimes corrupt the file association, leaving you with a file that looks correct but will not open. Extract first, then organize your folders however you like.
Checking File Compatibility Before You Cut
Not every cutting machine handles every file type the same way. Cricut users typically want the SVG file, while Silhouette users can use SVG or DXF depending on their software version. If you are using an older machine or a less common brand, the DXF or AI file might be your safest bet. But here is the catch: even when you have the right file type, the design might not import at the size you expect.
One of the most frequent complaints from buyers is that the design appears tiny on the mat. This is almost never a problem with the file itself—it is a scaling issue. Vector files often open at a default size that matches the original artboard dimensions. You must resize the design to fit your project. A design meant for a shirt might need to be 10 to 12 inches wide. A design for a mug might be 3 to 4 inches wide. Always check the dimensions in your software and adjust before cutting.
If you skip this step, you might end up with a decal that is too small to read or too large for your blank. Measure your item first, then scale the design accordingly. Most cutting programs let you lock the aspect ratio so the proportions stay correct.
Quality Expectations: Presentation vs. Actual Files
The images you see in the product listing are for presentation. They show the design clearly, but they are often scaled down or compressed for web display. The actual files you download will have a much higher resolution and cleaner lines. Do not judge the quality by the preview alone. If the preview looks slightly pixelated, the file itself likely does not. The PNG file alone is usually high-resolution enough for professional printing, and the vector files are infinitely scalable without losing sharpness.
No watermark will appear on your downloaded illustrations. That is a standard and important detail. If you see a watermark on the preview, that is only to protect the design during listing. Your files are clean and ready to use.
Common Mistakes When Applying the Design
Once you have cut your design, the real work begins. Applying heat transfer vinyl to a shirt, for example, requires the right temperature, pressure, and duration. People often assume that because they bought a nice design, it will automatically look perfect. But material choice and application technique matter just as much as the file itself.
For t-shirts and hoodies, use high-quality heat transfer vinyl and a heat press if possible. A home iron can work, but it requires consistent pressure and movement. Press too long and the vinyl may melt or discolor. Press too briefly and it will peel off after one wash. Test on a scrap piece of fabric first. For mugs and phone cases, you typically need sublimation printing or adhesive vinyl, not heat transfer. The same design works across all these items, but the method changes.
Another mistake is using the wrong weeding technique. Small details in the design, like the letters in "Peace Love Fifth Grade," need careful weeding. Use a weeding hook and take your time. Rushing leads to torn vinyl or lifted letters. If a letter is particularly thin, consider sizing the design up slightly to give the vinyl more structure.
Storage and Reuse of Your Files
Because this is a digital purchase, you have the files forever. Store them in a dedicated folder on your computer or cloud drive. Label the folder clearly so you can find it next year or when you need to make another gift. The files do not expire, and you can print or cut them as many times as you like.
One tip: keep the original zip folder as a backup in case individual files get accidentally modified or deleted. If you ever need to re-download, check your purchase history on the platform where you bought the listing. Most shops like sketchbundle keep your downloads available for a reasonable period, but it is wise to save a copy yourself.
What to Check Before You Buy
Before you complete your purchase, take a moment to confirm a few things. First, make sure the design is appropriate for the items you plan to make. "Peace Love Fifth Grade – Back to School" works beautifully on shirts, totes, hoodies, and even classroom decorations. But if you intend to put it on a very small object like a popsocket or a keychain, check that the text and details remain readable at a reduced size. Vector files scale well, but extremely small text may become illegible no matter how sharp the lines are.
Second, consider the color scheme of your blank. The design likely includes multiple colors or a single color. If you plan to cut it in one color, ensure that the design reads well in that single hue. Some designs rely on color contrast to separate elements. If you cut everything in black, for instance, overlapping parts might merge together. You may need to adjust the layers or choose a design that is already optimized for single-color cutting.
Third, verify that your cutting machine and software accept the file types included. Most modern machines handle SVG without issues, but it never hurts to double-check. If you are using an older model or a niche brand, the DXF file is often the most universally accepted vector format.
Avoiding Misunderstandings About Digital Purchases
Digital files are not returnable in the same way physical products are. Once you download them, you have the files. But that also means you have immediate access—no shipping, no waiting, no stockouts. If you are on a tight timeline, like making shirts for the first day of school, this instant download is a huge advantage. The files are available as soon as your payment processes.
Some buyers mistakenly think a digital file will include instructions for every possible use. While the listing may describe general applications (t-shirt, hoodie, mug, pillow, decal, phone case, tote bag, mobile popsocket), it will not include step-by-step tutorials for each. If you are new to using cutting machines, look up a basic tutorial for your specific device and material. The design itself is straightforward, but the process varies by machine and medium.
Getting the Best Results Every Time
Start with a test cut. Use a small piece of vinyl or cardstock to run through the cut before you commit to your final material. This confirms that the file is reading correctly, the blade is sharp, and the pressure is right. Adjust as needed. Then move to your actual project.
For items like mugs or pillows, consider using the PNG file with a sublimation printer if you have one. The high-resolution PNG works beautifully for full-color prints. For decals and phone cases, adhesive vinyl cut from the SVG file gives a clean, professional look. The versatility of having both vector and raster files means you are not locked into one method.
If you are making multiple items as gifts or for sale, create a template in your cutting software with the correct dimensions already set. That way you can import the design, resize it once, and cut repeatedly without re-measuring every time. Small efficiencies like this add up when you are producing several pieces.
Final Thoughts on Peace Love Fifth Grade – Back to School
This design is a meaningful way to celebrate a big school year. With the right approach, you can create lasting keepsakes that children and parents will appreciate. The key is understanding what you are getting—a set of digital files that you control from start to finish. Avoid the common pitfalls of using the wrong file type, skipping the extraction step, ignoring size scaling, or rushing the application. Take your time, test your setup, and enjoy the process of making something personal.
The Peace Love Fifth Grade – Back to School design, paired with the included SVG, AI, EPS, PNG, and DXF files, gives you all the flexibility you need. Whether you are crafting for your own family or building a small business, these files are ready when you are. Download them, unzip them, and start creating with confidence.