Back to School Skinny Tumbler PNG File: What to Know Before You Buy and Use
If you have spent any time browsing digital design shops, you have likely come across a Back to School Skinny Tumbler PNG File. It sounds straightforward—a design file you can download, print, and apply to a tumbler. But if you are new to sublimation or digital crafting, or even if you have some experience under your belt, there are details in that listing that can make or break your project. This article walks through what this type of design actually includes, where people typically get tripped up, and how to get the best result every time.
What a Back to School Skinny Tumbler PNG File Actually Is
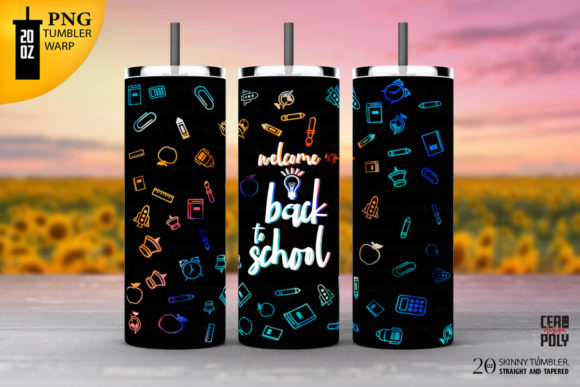
A Back to School Skinny Tumbler Sublimation Design is a digital graphic created specifically for printing onto straight and tapered tumblers. The listing typically includes two PNG files—one for a straight-sided tumbler and one for a tapered version. These files come without watermarks so you can use them immediately in your projects. The recommended sizing is 9.3 inches by 8.2 inches, though as the seller notes, you can resize the image for other surfaces.
This type of design is popular among small business owners, hobbyists, and teachers who want to create custom drinkware for the back-to-school season. The images often feature school-related motifs like pencils, apples, books, chalkboards, or phrases about learning and new beginnings. Because it is a PNG file, it has a transparent background, which makes layering and positioning easier in most editing software.
Why People Are Interested in This Design
The appeal is obvious. A ready-made design saves hours of original artwork creation. It lets you focus on the printing and assembly part of your business or hobby. For entrepreneurs who sell at craft fairs or on Etsy, having a polished design that fits common tumbler sizes is a huge time-saver. For parents or teachers making personalized gifts, it removes the guesswork of sizing and composition. But the convenience comes with a few common pitfalls that are easy to overlook.
Common Mistakes When Using a Back to School Skinny Tumbler PNG Design
Many people download the file, open it in their software, and immediately try to print without checking a few critical settings. That is where things go wrong. Let’s look at the most frequent errors and how to avoid them.
Mistake 1: Assuming the File Is Print-Ready Without Resizing
The listing clearly states that you will need to size the design to 9.3 x 8.2 inches in your image editing software. Yet many buyers skip this step or assume it will automatically fit their tumbler template. If you do not resize before printing, your design may be too small, leaving gaps on the tumbler, or too large, forcing you to crop important elements. The result is a project that looks unprofessional or requires reprinting, wasting both sublimation paper and ink.
Better approach: Open the PNG in a program like Adobe Photoshop, Affinity Photo, GIMP, or even Canva (if you have the right settings). Manually input the dimensions 9.3 inches by 8.2 inches at 300 DPI. This ensures the design prints at the correct size for most skinny tumblers. If you are using a different tumbler brand, measure your blank first and adjust accordingly.
Mistake 2: Ignoring the Straight vs. Tapered Difference
The listing includes one PNG for a straight tumbler and one for a tapered tumbler. Some people use the wrong file for their blank. A straight tumbler has uniform width from top to bottom, while a tapered tumbler is narrower at the top and wider at the bottom. If you use the straight design on a tapered tumbler, your image will look distorted or misaligned, especially at the seams.
Better approach: Before you start, confirm which type of tumbler you are using. Most standard skinny tumblers are tapered, but not all. Hold your file up to the physical blank if you are unsure. Use the correct PNG file for your specific blank. This small check eliminates the most common alignment headache.
Mistake 3: Not Checking Software Compatibility or Skill Level
The seller notes that you need the required software and knowledge to use these graphics. This is not a plug-and-play file for everyone. If you are using a basic photo viewer or a mobile app that does not support layering or resizing, you will struggle. Some people buy the file assuming they can print directly from their phone without adjustments. That usually leads to poor quality or incorrect sizing.
Better approach: If you are a beginner, use free software like GIMP or Photopea (a browser-based editor) to resize the PNG and position it. Watch a quick tutorial on setting canvas size and DPI before you start. If you are more experienced, make sure your software can handle transparent PNGs without adding a white background. Check your printer driver settings for scaling—turn off “fit to page” and set scaling to 100%.
Mistake 4: Overlooking the Resizing Flexibility
The listing mentions that the image can be resized to fit other projects, not just skinny tumblers. Many people miss this and assume the design is only for tumblers. If you only use it one way, you are leaving value on the table. You could use it for notebooks, tote bags, pencil cases, or wall art. However, resizing without maintaining aspect ratio can stretch or squash the image.
Better approach: When resizing for a different project, hold the Shift key (or use the lock aspect ratio button) in your software. This keeps the design proportional. For larger surfaces, you may need to accept some pixelation if you scale up too much. For smaller surfaces, ensure the resolution remains crisp at 300 DPI. Test on a small area first before committing to a full batch of products.
What to Check Before You Buy a Back to School Skinny Tumbler PNG File
Before clicking purchase, review a few details to ensure this file meets your needs. The Back to School Skinny Tumbler Sublimation Design is a digital product, so there is no physical item to inspect. Check that the file format is PNG, not JPEG or other compressed formats. Make sure the resolution is suitable for printing—300 DPI is standard for sublimation. Also verify that the license allows commercial use if you plan to sell the finished products. Some designers restrict use to personal projects or require attribution.
Look at the preview images carefully. Are there watermarks on the preview? The actual file you receive will be clean, but the preview gives you a sense of the colors and details. Note that colors may appear slightly different on screen versus print due to monitor calibration and printer profiles. It is smart to do a small test print before producing a large order.
Understanding the File Size and Transfer Process
Sublimation requires a mirrored print. Since PNG files are not automatically mirrored, you will need to flip the image horizontally in your software before printing. Forgetting this step is one of the most common errors among new users. The text and orientation will come out backwards if you skip it. The seller assumes you know this, so it is not always mentioned in the listing.
Better approach: Add a step to your workflow: after resizing, immediately flip the image horizontally. Check that any text in the design reads correctly in reverse—if it looks weird, it will print correctly. Make a habit of this every single time, even if you think you remember.
Practical Advice for Getting Professional Results
If you want your finished tumbler to look like it came from a boutique, pay attention to the quality of your blank. A cheap tumbler with uneven coating will produce patchy prints regardless of how good your PNG file is. Use high-quality polyester-coated blanks for the best color vibrancy. Also, consider your heat press time and temperature. The design file does not control these variables, so follow the blank manufacturer’s guidelines. Typical settings for a skinny tumbler are around 400°F for 60 to 90 seconds, but this varies by brand.
Examples of Realistic Uses
- A small business owner creates a limited-edition back-to-school collection with five different skinny tumbler designs. By using the Back to School Skinny Tumbler PNG File, they save design time and focus on marketing and assembly. They resize the PNG for both straight and tapered blanks and sell out within a week.
- A teacher makes personalized tumblers for each student in her class. She uses the tapered PNG file for 20 oz skinny tumblers and adds each child’s name using a text overlay in her editing software. The transparent background makes the name merge seamlessly with the design.
- A hobbyist uses the same PNG file to create coordinating pencil cases and notebook covers. They resize the image correctly for each surface, keeping the aspect ratio locked. The result is a matching set that looks intentional and polished.
How These Mistakes Affect Your Results
Failing to resize, using the wrong file type, or ignoring software requirements does not just waste time. It also costs money in wasted materials. Sublimation paper, ink, and tumbler blanks are not cheap. One misprinted tumbler may cost you several dollars in materials, plus the time to redo it. For a small business, that adds up quickly. On the satisfaction side, a poorly sized or aligned design can make you feel frustrated and doubt your ability to use digital files. Most of these problems are avoidable with a few minutes of preparation.
A Better Workflow Summary
- Open the correct PNG (straight or tapered) in your editing software.
- Set the canvas to 9.3 x 8.2 inches at 300 DPI.
- Position the design as desired. Use guides to center it.
- Mirror (flip horizontally) the entire image.
- Print on sublimation paper using high-quality settings.
- Follow your blank’s recommended time and temperature.
Following this sequence reduces errors and gives you consistent, professional-looking results. It also makes the file more versatile because you can adapt it for other projects by simply changing the canvas size while keeping the steps the same.
Final Thoughts on Choosing a Back to School Skinny Tumbler Design
The Back to School Skinny Tumbler PNG File is a valuable resource for anyone creating custom drinkware, gifts, or products for the school season. But like any digital asset, it requires a little knowledge and attention to detail. Check your software capabilities, choose the right file for your blank, resize accurately, and always mirror your image before printing. If you avoid the common mistakes outlined here, you will spend less time troubleshooting and more time creating things you are proud to sell or give away. Thanks for visiting the store—now go make something great.